Monday, November 23, 2009

Butternut Squash Risotto

YUM!!! I love Risotto and what says love in the fall more than butternut squash risotto? Haha. Please make, eat, and enjoy. It is delish and exactly what the fall weather calls for. This will be a little tricky telling you the recipe as I don't usually measure anything when I cook, just remember that I am a true chef at heart, and not a baker. I hardly measure anything when I cook, and when I do, it is only for you good kind hearted people who read this little blog of mine. Ok, here we go. Delicious Butternut Squash Risotto. (swoon)...
Ok, you will need the following: butternut squash, pancetta, arborio rice, butter, good white wine, GOOD Parmesan cheese, and stock. (I used turkey stock that was left over from our "friend's thanksgiving party, but veggie stock or chicken stock would work great too.)
De-Seed the squash, peel and cut into 1" cubes. Place on a baking tray, and preheat the oven to 400 degrees.
Pour GOOD olive oil over the squash and add salt and pepper. coat well and place in the oven for about 25 minutes, turning once halfway through.
Meanwhile, dice up one SMALL onion and about 2 ounces of the pancetta.
Get a large pan and place about 4-5 tablespoons of butter in the pan on medium heat.
As the butter melts down, add the diced pancetta and diced onions.
Allow to simmer for about 7 minutes until the onions become translucent. Meanwhile, place about 5 cups of stock (turkey, chicken or veggie) in a bot and bring to a simmer. You want to keep it hot, since when you add the warm stock to the risotto, it releases the starch in the rice.
Add about 1.5-2 cups of arborio rice.
Mix thoroughly to get the rice coated well with the butter.
Add about 2 cups of GOOD white wine. STIR.
Wait till the wine become absorbed by the rice, then add about two ladles of the warm stock to the risotto. Once those ladles become absorbed, add two more. Continue until cooked through, this roughly takes about 30 minutes of back and forth with adding the stock (2 ladles at a time) and stirring.
Here's a pic of my stock simmering away...
And here is my risotto, soaking up all it's goodness.
Once the butternut squash is cooked through in the oven, pop it into the risotto once the risotto is ALMOST cooked through. You want to add it right before it's cooked all the way through, so it can add in the flavor of the roasted butternut squash.
Go ahead and break it up with your wooden spoon, smash it up and the risotto becomes this beautiful rich orange color.
Add in another 2 ladles of the stock in order to let the squash soak up the flavors too as the risotto finishes cooking through.
Oh yes, did I mention, cooking always go better when you have a glass or two of wine? Shred up some Parmesan cheese to stir into the risotto, and enough to top each plate.
This cheese is DELICIOUS. I highly recommend.
SOOOOOO tasty!!! I couldn't stop eating it!

Saturday, November 21, 2009

Thanksgiving Day Cake Pops!!

Agh! These are too cute for words! Little turkey cake pops for the holiday, I mean, seriously? Ok, I know I have way too much time on my hand, but that happens when you're single I guess. Ha ha.

Make the cake balls as instructed in the Halloween Cake Pops post.

Roll them all out...I'm making 15 of these turkeys.

Now melt down some chocolate candy melts and insert the Popsicle sticks and place on a baking sheet lined with parchment paper. Place in the freezer for 10-15 minutes to firm up.

I searched several stores to find the perfect heads. I wanted the head to stand out from the chocolate melts that the "turkey's bodies" would be in and couldn't find anything in the color. Then I saw the caramels...Easy to mold and shape they were P E R F E C T!

You'll also need a black candy write for the eyes, Candy Heart shaped sprinkles for the gilds, and mini jelly bean type candies for the beaks. I found all of those at AC MOORE.
OK, make sure you have a clean surface and some clean hands as always. Unwrap a caramel and roll in your hand to get a nice circle.
Now...repeat 14 times...

Press the "beaks" into the caramel, about halfway. The caramel should hold it in place without needing a candy melt to bind them. Take the red heart sprinkles and gently push it upside down beneath the beak. Use the candy writer to make two little eyes.
You should make all of the heads while the pops are in the freezer firming up.
Too cute!
Take the pops out of the freezer and melt down some milk chocolate candy melts. Dip your pops in and use the pretzel sticks (each broken in half) as legs.
Just stick em right up there. Also attach the caramel heads before the chocolate has a chance to set. Once the head is set and the candy coating is firm, dip candy corns into the chocolate melts and hold in place on the pop until set. I used five going across, because it def gets time consuming!!
So cute!
Gobble Gobble..

Wednesday, November 18, 2009

Sweet Thanksgiving Bites

Puff Pasty, Puff Pastry... oh the tasty treats we can make! This is dedicated to my dear friend Sarah, as she is the first to request a recipe on the Sweet + Spicy Blog. :) Ok, how about a bite or two of the sweet cranberry sauce in a dessert form , since cranberry sauce often gets overlooked but wouldn't be thanksgiving without it? I see these being served with coffee and tea after a meal, although I made enough so I can gobble one up for breakfast too.

I was able to have access to some fresh cranberry sauce that was made for my mom's "friend's thanksgiving" that was this past Sunday, so score one for me! You can use the canned for this too, just mush it up to get rid of the can shape and add some orange rind to it too.
I love cream cheese!
I also scored some chestnut meat that had been roasted, however I think walnuts would go really well with this too so go ahead and chop some up!
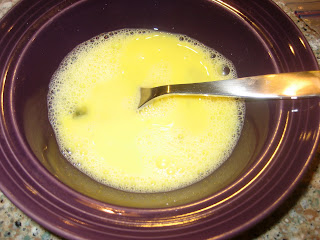
And of course, when working with pastry you almost always need an egg wash to help get that golden brown color. Just one egg to one table spoon of water.

Roll out your puff pastry sheet on a floured surface and cut into 3x3 squares.

Spoon in one tablespoon of the softened cream cheese to the center of each square.

Add a 3/4 tablespoon of the cranberry sauce on top of the cream cheese.

and of course just sprinkle some roasted chestnuts/walnuts on top.

Now, use the egg wash and lightly coat two opposite corners and fold over as shown. you want to pinch them together before folding over to make sure they will combine. Add a little dab of the egg wash to go under the "triangle" envelope to make sure it will stick to the side of the pastry dough.
Here's another shot.

Place the folded pastries on a lightly greased baking sheet and brush the egg wash over the pastry.

Bake in the oven at 375 degrees for about 15 minutes, until golden brown.

Let stand for ten minutes before serving and enjoy!
YUM!


Monday, November 16, 2009

Sour Cream Apple Pie with Cinnamon Streusel Topping

Well, the holiday season is upon us and that means, parties + food, food + parties. I made this apple pie this weekend, similar to my apple crisp but with the tanginess addition of sour cream and in pie form of course. I also visited my brother this past weekend, therefore I don't have step by step pictures, but I do have the full recipe for you all to enjoy. Thanks Bro + Sug for helping out!
Preheat oven to 400 degrees.
Peel core and thinly slice approximately 4 Granny Smith apples and 2 Red Delicious apples. Set inside a bowl of water with lemon juice to keep them for browning.
Beat together with mixer 1 cup sour cream, 2/3 cup sugar, 2 tablespoons flour, 1/2 teaspoon kosher salt, 1 teaspoon vanilla, 1 large egg.
Pat the apples dry on towel to rid the excesss water, and add the apples to the sour cream mixture, and coat well. (DO NOT USE MIXER! ;)
Put filling into a pie shell and bake for 25 minutes.
While Pie filling is cooking up, mix together 1/2 cup brown sugar, 1/3 cup flour, 1/4 cup room temperature butter, 1/2 teaspoon of cinnamon. Crumble together with your hands to make sure it combines well. Remove pie from oven and sprinkle the streusel topping on top of the pie. Bake for an additional 20 minutes.
Let cool so it's not piping hot, but best served warm.
Everyone loved it this weekend!

Saturday, November 7, 2009

Cheesecake Bites

I had to make a dessert for a small dinner party yesterday, and I completely forgot about it until an hour before I was supposed to be there! I saw in the freezer a Sara Lee Cheesecake, in the pantry I had some candy melts...and voila! Problem solved. Cheesecake Bites!


Thaw out your cheesecake from the freezer, or bake a fresh one. I was crunched for time so I just let it sit out for 20 minutes. Get a bowl full of graham cracker crumbs and set aside. I used a tablespoon measuring spoon to help scoop out a "ball" of cheesecake, formed it into a ball and rolled it in the graham cracker crumbs.
I lined a baking sheet with parchment paper and started placing my coated bites.
Just a few more..

Once you roll all the bites you need, place the cookie sheet in the freezer for about ten minutes so they can firm up.

Then just melt some chocolate or candy melts down and decorate your heart out. I just dunked these in some melted dark chocolate and shaved some white chocolate bark on top.
Make sure the coating doesn't harden up before you add the topping.
YUM.